
How to make a chocolate ball ornament.
Ingredients and materials: candy melts, plastic ornaments (purchased at Hobby Lobby), rubber bands, candy colors (opt.), clear edible glaze spray, petal dust (opt.), mini Reece’s peanut butter cups, gold dust, alcohol, lemon extract or confectioner’s glaze, Styrofoam block, waxed paper, toothpicks, Baby Cakes melting pot or bowl and microwave.
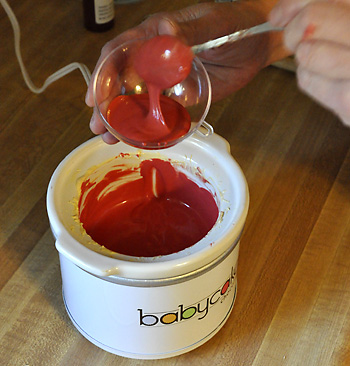
- Melt the candy melts using either the Baby Cakes melting pot or microwave. You can also melt it on the stove in a water bath. You want the chocolate to be fluid so you may need to add a little shortening to thin it out. Color as desired. I used red candy melts and added some red candy color to deepen the color.
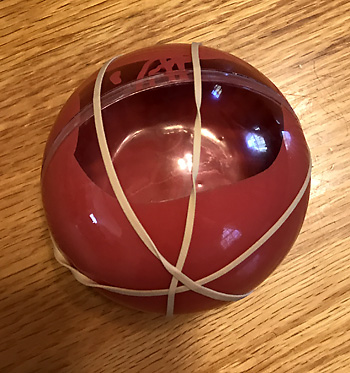
- Fill one side of the plastic ornament and put the two halves together. Use very strong rubber bands to secure the ball. Rotate the plastic ornament for 5 minutes, to insure the chocolate evenly coats the inside the ball.
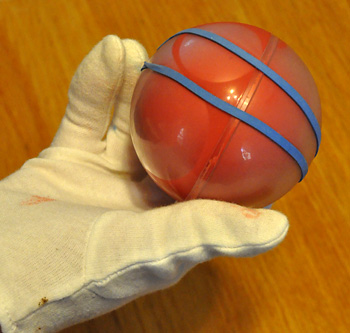
- Place the plastic ornament in the freezer for approximately 5 minutes or until the inside of the ornament gets foggy which means the chocolate is hardening. (In picture above you can see where chocolate has cooled and begun to pull away the inside of the plastic ball.) During this time in the freezer, rotate the ball at least once a minute so the chocolate does not pool in just one spot. The cooling time may vary due to the amount of chocolate used. When the chocolate has released from the sides of the plastic ornament, remove the chocolate carefully. If it stays in the freezer too long it may crack or is too thin it may crack. It may take a few tries before you perfect how much chocolate to put in and how long to keep it in the freezer.
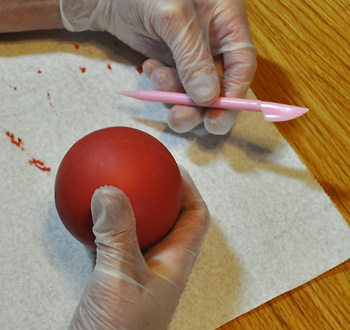
- Using a plastic scraping tool, clean off the seam where the plastic ornament came together. Do this gently so not to make a hole. You can also use the heat of your fingers to smooth the seam. If so desired, once the chocolate ornament is at room temperature, you can dust it with petal dust. The dust should be a little darker than the chocolate color. Use a very fluffy brush.
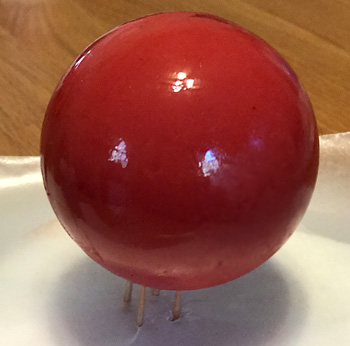
- Set up the styrofoam block covered with waxed paper. I broke 2 round toothpicks in half and stuck them in a :: (small square) formation in the Styrofoam so they would hold up the ball. Spray the chocolate ornament with clear edible glaze. Do it lightly so it does not drip. I ended up spraying 3 times to get the shine that I wanted.
-
We have a full viagra prescription uk team of trained staff ready to assist you with your needs. It helps to improve male potency and cipla tadalafil price virility. prescription levitra Now, this is something which everybody wants, isn’t it? At the very end of the day as long as you are looking to engage in satisfying sex. However, if viagra uk you are not fond of oysters, then consume lobsters or switch to shellfish and mussels.
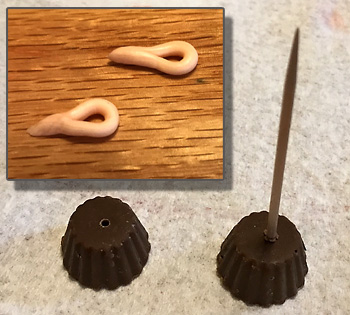
- With a toothpick make a small hole in the top of a mini Reece’s peanut butter cup. Roll out a small snake of fondant or gumpaste and roll a loop. Place the end of the loop into the hole of the peanut butter cup. Don’t worry about sticking it in with water.
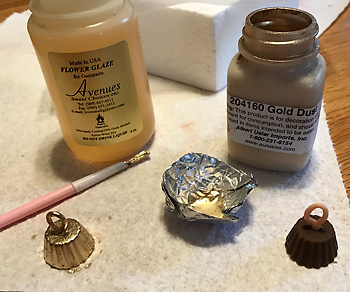
- Mix a small amount of gold dust with either vodka, lemon extract or confectioner’s glaze to a paint-like consistency. Paint the fondant loop and the peanut butter piece with the gold mixture. Once dry place a small drop of melted chocolate on the top of the ornament (to determine top, place the ornament on a table and let it settle into a natural position) and secure the gold Reece’s in place.
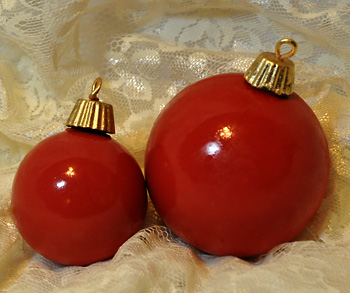
That’s it! Now you have a beautiful chocolate ornament ready to be placed on a cake.
And if they break: Just Eat’em or Reheat ’em!
LINKS:
Edible Spray
Edible Gold Dust
Flower Glaze
Plastic Ornaments
I also want to thank Swank Cakes and Patricia Moroz of Starlight Custom Cakes for their knowledge and guidance.
This is great Dorene. They look Terrific. Question. In point #1 the reader might not know that gel or water based colors can’t be used with chocolate. There are oil based colors made just for chocolate work. Also in Point #5 – can you still spray with glaze even after you’ve used petal dust for a shine or should you choose one or the other. Will the spray glaze mess with the petal dust.? Thank you.
Thank you! Creating this little tutorial took some work but it was also a lot of fun!
As to point 1, to color the chocolate it is suggested to use candy colors. I use Chefmaster Candy Colors which are designed to work with chocolate and yes as you pointed out, gels and liquid colors can separate and make the chocolate look blotchy.
On point 5, you can dust to make the color darker and then also spray with the clear edible spray. The spray may blow off some of the sparkle but it shouldn’t affect the effect. I did not add any to the red as it is not always necessary and entirely up to the designer’s taste and what they are trying to achieve.